As a trusted supplier of NISSAN Wheel Hubs, I often receive inquiries from customers about various maintenance and replacement procedures. One common question that comes up is how to replace the seal on a NISSAN Wheel Hub. In this blog post, I'll walk you through the step - by - step process of replacing the wheel hub seal, providing you with all the necessary information to complete this task successfully.
Why Replace the Wheel Hub Seal?
The wheel hub seal plays a crucial role in protecting the wheel hub assembly. It prevents dirt, water, and other contaminants from entering the hub, which could otherwise damage the bearings and cause premature wear. A damaged or worn - out seal can lead to leaks of the lubricating grease inside the hub, reducing the effectiveness of the bearings and potentially leading to costly repairs.


Tools and Materials You'll Need
- Socket set
- Seal puller
- Hammer
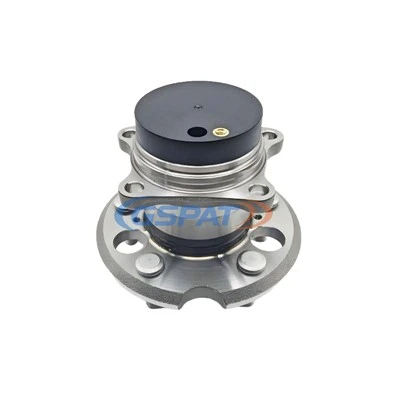
- New wheel hub seal (make sure it is the correct part for your NISSAN model. For example, if you have a Nissan 370Z 2009 - 2018 Rear, you might need the 43202 - 4GA0A Wheel Hub For Nissan 370Z 2009 - 2018 Rear. For a Nissan Navara 2004 - AWD Front, the 40202 - 4JA3A For Nissan Navara 2004 - AWD Front could be the right fit. And for a Nissan Qashqai II 2013 - FWD Front, the 40202 - 4EA1A Rear Wheel Bearing Hub Assembly Nissan Qashqai II 2013 - FWD Front might be required.)
- Grease
- Clean rags
- Safety goggles
- Gloves
Step - by - Step Guide to Replace the Wheel Hub Seal
Step 1: Prepare the Vehicle
First, park your NISSAN on a flat, level surface and engage the parking brake. If you're working on a front wheel, you may also want to chock the rear wheels for added safety. Loosen the lug nuts on the wheel you'll be working on, but don't remove them just yet. Then, use a jack to lift the vehicle until the wheel is off the ground. Once the wheel is lifted, remove the lug nuts and take the wheel off.
Step 2: Remove the Brake Caliper and Rotor (if necessary)
In some cases, you may need to remove the brake caliper and rotor to access the wheel hub seal. To remove the brake caliper, locate the caliper bolts and use a socket wrench to loosen and remove them. Be careful not to let the caliper hang by the brake hose; you can use a piece of wire or a bungee cord to support it. Next, remove the rotor. Some rotors may be held in place by a small screw; if so, remove the screw before sliding the rotor off.
Step 3: Remove the Old Seal
Once you have access to the wheel hub, use a seal puller to remove the old seal. Insert the seal puller into the groove of the seal and gently pry it out. If you don't have a seal puller, you can try using a flat - head screwdriver, but be very careful not to damage the hub or the surrounding area. If the seal is stubborn, you can use a hammer to tap the puller or screwdriver gently to loosen it.
Step 4: Clean the Hub
After removing the old seal, use a clean rag and some degreaser to clean the area where the seal was located. Make sure to remove any dirt, grease, or debris. This will ensure a proper fit for the new seal. Also, check the hub for any signs of damage or wear. If you notice any rough spots or grooves, it may be necessary to replace the hub as well.
Step 5: Apply Grease
Before installing the new seal, apply a thin layer of grease to the lip of the seal. This will help it slide into place easily and provide a better seal. You can also apply a small amount of grease to the area where the seal will be installed in the hub.
Step 6: Install the New Seal
Carefully place the new seal into the hub, making sure it is centered and seated properly. Use a seal installer or a block of wood and a hammer to gently tap the seal into place. Make sure the seal is flush with the surface of the hub. Be careful not to damage the seal during installation.
Step 7: Reassemble the Components
Once the new seal is installed, reattach the rotor (if you removed it) and the brake caliper. Tighten the caliper bolts to the manufacturer's specifications. Then, put the wheel back on and hand - tighten the lug nuts. Lower the vehicle to the ground using the jack and then use a torque wrench to tighten the lug nuts to the correct torque value.
Tips and Precautions
- Always follow the manufacturer's instructions and safety guidelines when working on your vehicle.
- Wear safety goggles and gloves to protect yourself from any potential hazards.
- Make sure you have the correct replacement seal for your NISSAN model. Incorrect seals may not fit properly and could lead to further problems.
- If you're unsure about any step of the process, it's always a good idea to consult a professional mechanic.
Contact Us for Your Wheel Hub Needs
As a leading supplier of NISSAN Wheel Hubs, we have a wide range of high - quality products to meet your needs. Whether you're looking for a replacement wheel hub or just need the seal replaced, we can provide you with the right parts and support. If you're interested in purchasing our products or have any questions about wheel hub maintenance, don't hesitate to contact us. We're here to help you keep your NISSAN running smoothly.
References
- Nissan Vehicle Service Manuals
- Automotive repair textbooks on wheel hub maintenance